2010年10月11日月曜日

C# 魔改造 02 - 言語内 DSL -

書き易さと読み易さのせめぎ合い?

登場が 2001 年だから、C# はもうすぐ 10 周年なのだなーと振り返りつつ。

大目標は相互運用。初めからマネージド/アンマネージドコードが混じり合えたし、P/Invoke で API の直叩きも簡単。COM とのやり取りも RCW が良しなにしてくれる。CLS に則っていさえすれば、VB .NET や C++/CLI で書かれたクラスやメソッドも何の苦労も無く利用できる。

2.0 ではコンパイル時埋め込み系の Generics 導入。Nullable 型で 値型か null を扱えるようになった。partial クラスで自動生成向けの部分と人が書く部分を別ファイルで扱えるように。あと匿名メソッドも。

3.0 ではラムダ式や拡張メソッドが扱えるようになって、関数型言語のパラダイムも取り込んでみたり。型推論や匿名型も入った。LINQ?なにそれおいしいの?

4.0 になると dynamic 型で Python や Ruby みたいな動的型付言語とも簡単に繋がるようになる。COM とのやり取りもさらに便利になった。PLINQ?もう for 文書いたら負けなのかも…。

こんな感じでなかなか盛りだくさんな言語仕様になってます (^_^;)。相互運用という大目標と、並列コンピューティングへの対応やむなしで、公式で今後も順次魔改造されていくはず。
なので、せめてライブラリ側で統一感を出したり、紋切り型の処理を簡単に呼び出せると良いかな?と。いくつかサンプル、並べてみました。


以下の記事/ライブラリを使用/参考にさせていただいてます。ありがたく使わせていただきますm(_ _)m
moq - Project Hosting on Google Code
 http://code.google.com/p/moq/
DynamicProxy :: Castle Project
 http://www.castleproject.org/dynamicproxy/index.html
C# 3.0 Supplemental Library: Achiral - NyaRuRuの日記
 http://d.hatena.ne.jp/NyaRuRu/20080115/p1
takeshik's linx at master - GitHub
 http://github.com/takeshik/linx
進化するアーキテクチャーと新方式の設計: 流れるようなインターフェース
 http://www.ibm.com/developerworks/jp/java/library/j-eaed14/?ca=drs-jp
プログラミング言語 Scala Wiki - トップページ
 http://www29.atwiki.jp/tmiya/pages/1.html


1. 3 項演算子(?: 演算子)
まずは null チェックして…って処理が毎回出てくるので。

NotDefault
サンプル

using System;
using System.Collections.Generic;

namespace ConsoleApplication1
{
class Program
{
static void Main(string[] args)
{
// null チェックして null の場合はデフォルト値を返すバージョン。
Console.WriteLine("Value1: {0}", new A().NotDefault(a => a.B).NotDefault(b => b.Value));
Console.WriteLine("Value2: {0}", new A(new B()).NotDefault(a => a.B).NotDefault(b => b.Value));
Console.WriteLine("Value3: {0}", new A(new B(10)).NotDefault(a => a.B).NotDefault(b => b.Value));
/* 実行結果
*
* Value1: 0
* Value2: 0
* Value3: 10
*
*/


// null チェックして null の場合は何もしないバージョン。
new A().NotDefault(a => a.B).NotDefault(b => Console.WriteLine("Value1: {0}", b.Value));
new A(new B()).NotDefault(a => a.B).NotDefault(b => Console.WriteLine("Value2: {0}", b.Value));
new A(new B(10)).NotDefault(a => a.B).NotDefault(b => Console.WriteLine("Value3: {0}", b.Value));
/* 実行結果
*
* Value2: 0
* Value3: 10
*
*/
}
}

class A
{
public A() { }
public A(B b) { B = b; }
public B B { get; set; }
}

class B
{
public B() { }
public B(int value) { Value = value; }
public int Value { get; set; }
}

public static class My
{
public static S NotDefault<T, S>(this T obj, Func<T, S> f)
{
return EqualityComparer<T>.Default.Equals(obj, default(T)) ? default(S) : f(obj);
}

public static void NotDefault<T>(this T obj, Action<T> a)
{
if (!EqualityComparer<T>.Default.Equals(obj, default(T))) a(obj);
}
}
}


2. 複数の as キャスト
連続で as キャストしながら条件分岐する場合、使わない変数のスコープが有効になってしまうので。

As
サンプル

using System;

namespace ConsoleApplication1
{
class Program
{
static void Main(string[] args)
{
NormalAs(4);
NormalAs(4d);
NormalAs("4");
try
{
NormalAs(4m);
}
catch (NotSupportedException e)
{
Console.WriteLine(e.Message);
}
/* 実行結果
*
* Result: 16
* Result: 8
* Result: Hello, 4
* 指定されたメソッドはサポートされていません。
*
*/


MyAs(4);
MyAs(4d);
MyAs("4");
try
{
MyAs(4m);
}
catch (NotSupportedException e)
{
Console.WriteLine(e.Message);
}
/* 実行結果
*
* Result: 16
* Result: 8
* Result: Hello, 4
* 指定されたメソッドはサポートされていません。
*
*/
}

static void NormalAs(object o)
{
// 通常版。
var ni = default(int?);
var nd = default(double?);
var s = default(string);
if ((ni = o as int?) != null)
{
Console.WriteLine("Result: {0}", ni * ni);
}
else if ((nd = o as double?) != null)
{
Console.WriteLine("Result: {0}", nd + nd);
}
else if ((s = o as string) != null)
{
Console.WriteLine("Result: {0}", "Hello, " + s);
}
else
{
throw new NotSupportedException();
}
}

static void MyAs(object o)
{
// DSL 版。
o.
As<int?>().Do(ni => Console.WriteLine("Result: {0}", ni * ni)).
As<double?>().Do(nd => Console.WriteLine("Result: {0}", nd + nd)).
As<string>().Do(s => Console.WriteLine("Result: {0}", "Hello, " + s)).
As().Do(_o => { throw new NotSupportedException(); });
}
}

public static class My
{
static class Default
{
public static readonly EmptyAs EmptyAs = new EmptyAs(null);
}

static class Default<T>
{
public static readonly EmptyAs<T> EmptyAs = new EmptyAs<T>(null);
}

public static As<T> As<T>(this object o)
{
return o == null ? Default<T>.EmptyAs : new As<T>(o);
}

public static As As(this object o)
{
return o == null ? Default.EmptyAs : new As(o);
}
}

public class As
{
protected readonly object o;
public As(object o)
{
this.o = o;
}

public virtual void Do(Action<object> action)
{
action(o);
}
}

public class EmptyAs : As
{
public EmptyAs(object o)
: base(o)
{
}

public override void Do(Action<object> action)
{
}
}

public class As<T> : As
{
public As(object o)
: base(o)
{
}

public virtual object Do(Action<T> action)
{
if (o is T)
{
action((T)o);
return null;
}
else
{
return o;
}
}
}

public class EmptyAs<T> : As<T>
{
public EmptyAs(object o)
: base(o)
{
}

public override void Do(Action<object> action)
{
}

public override object Do(Action<T> action)
{
return null;
}
}
}


3. ローンパターン(Loan Pattern)
IDisposable なクラスであれば標準で using があるけど、それ以外でも統一的な構文があると良いかと。

使い終わったら消える一時ファイル
サンプル

using System;
using System.IO;
using Microsoft.VisualBasic.FileIO;

namespace ConsoleApplication1
{
class Program
{
static void Main(string[] args)
{
My.UsingTempFile(tempFile =>
{
using (var fileStream = new FileStream(tempFile, FileMode.Create, FileAccess.Write))
using (var streamWriter = new StreamWriter(fileStream))
{
streamWriter.WriteLine("Hello, Internal DSL !!");
}

using (var fileStream = new FileStream(tempFile, FileMode.Open, FileAccess.Read))
using (var streamReader = new StreamReader(fileStream))
{
Console.WriteLine(streamReader.ReadToEnd());
}

throw new ApplicationException();
});
/* 実行結果(※エラーが発生してもファイルは削除される)
*
* Hello, Internal DSL !!
*
* TestCase 'M:ConsoleApplication1.Program.Main(System.String[])' failed: アプリケーションでエラーが発生しました。
* System.ApplicationException: アプリケーションでエラーが発生しました。
* Program.cs(28,0): 場所 ConsoleApplication1.Program.<Main>b__0(String tempFile)
* Program.cs(45,0): 場所 ConsoleApplication1.My.UsingTempFile(Action`1 action)
* Program.cs(14,0): 場所 ConsoleApplication1.Program.Main(String[] args)
*
*/
}
}

public static class My
{
public static void UsingTempFile(Action<string> action)
{
string tempFile = Path.GetFileNameWithoutExtension(FileSystem.GetTempFileName()) + ".txt";
try
{
action(tempFile);
}
finally
{
try
{
File.Delete(tempFile);
}
catch { }
}
}
}
}


使い終わったらアンロードされる AppDomain
サンプル

using System;
using System.Reflection;

namespace ConsoleApplication1
{
class Program
{
static void Main(string[] args)
{
Console.WriteLine("Domain Name: {0}", AppDomain.CurrentDomain.FriendlyName);
My.UsingNewDomain(() =>
{
Console.WriteLine("Domain Name: {0}", AppDomain.CurrentDomain.FriendlyName);
});
/* 実行結果(※エラーが発生しても AppDomain は(ry)
*
* Domain Name: ConsoleApplication1.exe
* Domain Name: NewDomain
*
*/
}
}

public class MarshalByRefAction : MarshalByRefObject
{
public MarshalByRefAction(Action action)
{
Action = action;
}

public Action Action { get; private set; }

public void Do()
{
if (Action != null) Action();
}
}

public static class My
{
public static void UsingNewDomain(Action action)
{
var domain = default(AppDomain);
try
{
domain = AppDomain.CreateDomain("NewDomain", null, AppDomain.CurrentDomain.SetupInformation);
var marshalByRefAction =
(MarshalByRefAction)domain.CreateInstanceAndUnwrap(
typeof(MarshalByRefAction).Assembly.FullName,
typeof(MarshalByRefAction).FullName,
true,
BindingFlags.Default,
null,
new object[] { action },
null,
null,
null);
marshalByRefAction.Do();
}
finally
{
if (domain != null)
AppDomain.Unload(domain);
}
}
}
}


使い終わったら元に戻る Singleton オブジェクト
サンプル

using System;
using System.Reflection;

namespace ConsoleApplication1
{
class Program
{
static void Main(string[] args)
{
Singleton.Instance.Action();
My.UsingMockSingleton(new MockSingleton(), () =>
{
// ここでは Mock に入れ替わっている。
Singleton.Instance.Action();
});
Singleton.Instance.Action();
/* 実行結果
*
* This is real object !! 48649253
* This is mock object !!
* This is real object !! 48649253
*
*/
}
}

public static class My
{
public static void UsingMockSingleton(Singleton mock, Action action)
{
var last = Singleton.Instance;
var instanceField = typeof(Singleton).GetField("instance", BindingFlags.Static | BindingFlags.NonPublic);
try
{
instanceField.SetValue(null, mock);
action();
}
finally
{
instanceField.SetValue(null, last);
}
}
}

public class Singleton
{
protected Singleton() { }
static Singleton instance = new Singleton();
public static Singleton Instance { get { return instance; } }

public virtual void Action()
{
Console.WriteLine("This is real object !! {0}", this.GetHashCode());
}
}

public class MockSingleton : Singleton
{
public MockSingleton()
{
}

public override void Action()
{
Console.WriteLine("This is mock object !!");
}
}
}


4. 匿名型の型推論
List<T> とかの Generics な型に匿名型を指定したい場合に必要…というか匿名型冷遇され過ぎな気がががが(´・ω・`)
ちなみに、このサンプルで出てくるような、「インターフェースのメソッドをデリゲートで入れ替えられるようなもの」をいくつも作るのが面倒になって思いついたのが NAnonym の LocalClass だったり。

匿名型から Generics な型を生成
サンプル

using System;
using System.Collections.Generic;

namespace ConsoleApplication1
{
class Program
{
static void Main(string[] args)
{
var array = new[] { new { Key = 1, Value = "aaaa" }, new { Key = 3, Value = "cccc" }, new { Key = 2, Value = "bbbb" } };
var list = My.CreateList(array[0]);
list.AddRange(array);
list.Insert(1, new { Key = 4, Value = "dddd" });
list.Add(new { Key = 5, Value = "eeee" });

list.ForEach(item =>
{
Console.WriteLine(item);
});
/* 実行結果
*
* { Key = 1, Value = aaaa }
* { Key = 4, Value = dddd }
* { Key = 3, Value = cccc }
* { Key = 2, Value = bbbb }
* { Key = 5, Value = eeee }
*
*/

var comparer = My.CreateComparer(array[0], (x, y) => x.Key - y.Key);
list.Sort(comparer);

list.ForEach(item =>
{
Console.WriteLine(item);
});
/* 実行結果
*
* { Key = 1, Value = aaaa }
* { Key = 2, Value = bbbb }
* { Key = 3, Value = cccc }
* { Key = 4, Value = dddd }
* { Key = 5, Value = eeee }
*
*/
}
}

public static class My
{
public static List<T> CreateList<T>(T obj)
{
return new List<T>();
}

public static IComparer<T> CreateComparer<T>(T obj, Func<T, T, int> comparer)
{
return new DelegateComparer<T>(comparer);
}
}

public class DelegateComparer<T> : IComparer<T>
{
public static readonly Func<T, T, int> DefaultComparer = (x, y) => Comparer<T>.Default.Compare(x, y);

Func<T, T, int> comparer;

public DelegateComparer()
: this(null)
{
}

public DelegateComparer(Func<T, T, int> comparer)
{
this.comparer = comparer == null ? DefaultComparer : comparer;
}

#region IComparer<T> Member

public int Compare(T x, T y)
{
return comparer(x, y);
}

#endregion
}
}


すみません…だいぶ長くなりましたのでとりあえずこの辺で。順次構文拡大中なので、また面白いものがあれば紹介させていただきます。ところで、個人的には、Scala の名前渡しパラメータ がすごく欲しかったり。見栄えがきれいになるのだよー。~(´ー`~)

2010年7月18日日曜日

C# 魔改造 01 - Wish List(or Design Goal) -

ソフトウェアって思ったより"ソフト"じゃないじゃない?って思ったのが発端。

結果がわからないものや、とりあえず反応が見てみたいものはプロトタイピングしながら作っていくことが少なくないと思うけど、さて動くものができたって段階になると作り直すのもあれだし…って感情がたぶん湧く。お金掛けて作った(作ってもらった)ものは特に。こんな時に相談された場合には必ず「作り直したほうがいいものができる」って思うと思う。でも時間やお金の問題、色んな状況や立場の人がいらっしゃる場所では、完全にゼロからやり直すのは難しい。

プログラム作る時、テストを書く人が増えてきていると思う。納品物として、ユニットテストのソースコードも指定するお客さんがいたり、オープンソースのコードを読もうとすると大抵付いてたり。TDD って言葉も知ってる人が多いみたい。テストを書いておけば、特に最初の立ち上げが有利になるし、変更があった場合もデグレが発見されやすい。適当な場所にブレークを張って動かせるのは、動作の理解にも役に立つ。良いことが多いのだけれど、良いテストを書くにはたくさん訓練しなければならないし、最初から条件を揃えるのはやっぱり試行錯誤が必要になる。

経緯はこんな感じです。ソフトウェアの動作を安全にかつ根本的に変える治具?のようなライブラリがあってもいいんじゃないかと思いましたので、とりあえず今あるアイディア、吐き出してみました。


以下の記事/ライブラリを使用/参考にさせていただいてます。ありがたく使わせていただきますm(_ _)m
CodeDom Assistant - CodeProject
 http://www.codeproject.com/KB/cs/codedom_assistant.aspx
CodeDOM, <providerOption name="CompilerVersion" value="3.5" /> not working?! and how to retrieve providerOption at runtime?
 http://social.msdn.microsoft.com/Forums/en-US/netfxbcl/thread/512d9fdd-61af-4a0c-b78a-2f88738e651a
Creating and Initializing Objects in CodeDom [Benet Devereux] - BCL Team Blog - Site Home - MSDN Blogs
 http://blogs.msdn.com/b/bclteam/archive/2006/04/10/571096.aspx
DynamicProxy :: Castle Project
 http://www.castleproject.org/dynamicproxy/index.html
LINQ Expression Trees-Lambdas to CodeDom Conversion | Coding Day
 http://www.codingday.com/meta-programming-with-expression-trees-lambdas-to-codedom-conversion/
moq - Project Hosting on Google Code
 http://code.google.com/p/moq/
C# 3.0 Supplemental Library: Achiral - NyaRuRuの日記
 http://d.hatena.ne.jp/NyaRuRu/20080115/p1
NUnit - Home
 http://www.nunit.org/index.php?p=home
ECMA C# and Common Language Infrastructure Standards
 http://msdn.microsoft.com/en-us/netframework/aa569283.aspx
Cecil - Mono
 http://www.mono-project.com/Cecil
.NET Reflector, class browser, analyzer and decompiler for .NET
 http://www.red-gate.com/products/reflector/
Reflexil | Download Reflexil software for free at SourceForge.net
 http://sourceforge.net/projects/reflexil/
TomCarter.Developer - DSM Plugin for Reflector.NET
 http://tcdev.free.fr/
SequenceViz
 http://sequenceviz.codeplex.com/wikipage?title=ReflectorPlugin&ProjectName=sequenceviz
.NET Reflector Add-Ins ReflectionEmitLanguage
 http://reflectoraddins.codeplex.com/wikipage?title=ReflectionEmitLanguage&referringTitle=Home
Seasar.NET プロジェクト
 http://s2container.net.seasar.org/ja/seasarnet.html


1. 式木 + CIL - ExpressiveILProcessor -
式木がせっかく強力なので、もう少し微調整ができるとうれしいと思いついた、式木の中身を CIL に展開してくれるクラス。System.Reflection.Emit 名前空間や Mono.Cecil.Cil 名前空間のクラスと組み合わせて強力な縁の下の力持ちになってくれるはず。

ExpressiveILProcessor の利用イメージ
Program.cs
呼び側のイメージ。

using System;
using System.Reflection.Emit;
using Mono.Cecil;
using Urasandesu.NAnonym.CREUtilities;
using MC = Mono.Cecil;
using SR = System.Reflection;

namespace Test
{
class Program
{
static void Main()
{
// ToTypeDef は System.Type から Mono.Cecil.TypeDefinition に変換する拡張メソッド。
var mainDef = typeof(Program).ToTypeDef();

var testDef = new MethodDefinition("Test",
MC.MethodAttributes.Private | MC.MethodAttributes.Static, mainDef.Module.Import(typeof(void)));
mainDef.Methods.Add(testDef);

// 式木で直接 Emit。
var egen = new ExpressiveILProcessor(testDef);
egen.Emit(_ => Console.WriteLine("aiueo"));

// .NET 3.5 までだと変数の宣言や代入式無理。
// → ExpressiveILProcessor 自身のメソッドを定義。
int a = 0;
egen.Emit(_ => _.Addloc(() => a, default(int)));
egen.Emit(_ => _.Stloc(() => a, 100));

// ローカル変数に入れた上ににアクセスする場合。
var cachedAnonymousMethod = default(DynamicMethod);
var gen = default(ILGenerator);
var label27 = default(Label);
egen.Emit(_ => _.Addloc(() => cachedAnonymousMethod,
new DynamicMethod("cachedAnonymousMethod", typeof(string), new Type[] { typeof(string) }, true)));
egen.Emit(_ => _.Addloc(() => gen, _.Ldloc(() => cachedAnonymousMethod).GetILGenerator()));
egen.Emit(_ => _.Addloc(() => label27, _.Ldloc(() => gen).DefineLabel()));
egen.Emit(_ => _.Ldloc(() => gen).Emit(SR.Emit.OpCodes.Brtrue_S, _.Ldloc(() => label27)));

// 通常の Emit 処理混合。
egen.Emit(_ => _.Direct.Emit(MC.Cil.OpCodes.Ldc_I4_S, (sbyte)100));
egen.Emit(_ => _.Direct.Emit(MC.Cil.OpCodes.Stloc, _.Locals(() => a)));
}
}
}


2. Java の便利を C# にも - LocalClass -
interface を受け取るメソッドと匿名~が相性悪いと思いついた。Java のローカルクラスをイメージ。moq が近かったのだけれど、所詮は式木だったので (^_^;)。.NET 4.0 になればもう少し多機能化されるのかも。

LocalClass の利用イメージ
Program.cs
呼び側のイメージ。

using System;
using Urasandesu.NAnonym.DI;

namespace Test
{
public class Program
{
static void Main()
{
var localClass = new LocalClass<IHoge>();
// Setup で中身を編集。
localClass.Setup(the =>
{
// メソッドの設定。中身を定義し、Override で同じ I/F を持つメソッドをオーバーライド。
the.Method(() =>
{
if (DateTime.Now < new DateTime(2010, 1, 1))
{
Console.WriteLine("こんにちは!世界!");
}
else
{
Console.WriteLine("Hello, World!!");
}
})
.Override(_ => _.Output);

the.Method(() =>
{
return "Hello, Local Class !!";
})
.Override(_ => _.Print);

the.Method((string content) =>
{
return "Hello, " + content + " World !!";
})
.Override(_ => _.Print);


// プロパティの設定。中身を定義し、Override で同じ I/F を持つプロパティをオーバーライド。
int this_value = 0;
the.Property(() =>
{
return this_value;
})
.Override(_ => () => _.Value);

the.Property((int value) =>
{
this_value = value * 2;
})
.Override(_ => value => _.Value = value);
});

// Load でアセンブリ生成。キャッシュ。
localClass.Load();

// New でインスタンス化。
var hoge = localClass.New();

// 実行
hoge.Value = 10;
Console.WriteLine(hoge.Value);
Console.WriteLine(hoge.Print());
Console.WriteLine(hoge.Print("Local Class"));
/*
* 20
* Hello, Local Class !!
* Hello, Local Class World !!
*/
}
}

// 対象のインターフェース
interface IHoge
{
int Value { get; set; }
void Output();
string Print();
string Print(string content);
}
}


3. Load Time Weaving - GlobalClass -
これが一番核になると思う。I/F は LocalClass のそれを踏襲。.NET Framework はアセンブリの厳密名があるので、そこまで自由には Weaving できないけど、変更がだいぶ気前良くできるようになるはず。

GlobalClass の利用イメージ
Class1.cs
元のクラス 1

namespace Test
{
public class Class1
{
public string Print(string value)
{
return "Hello, " + new Class2().Print(value) + " World !!";
}
}
}


Class2.cs
元のクラス 2

namespace Test
{
public class Class2
{
public string Print(string value)
{
return "こんにちは、" + value + " 世界!";
}
}
}


GlobalClass1.cs
元のクラス 1を Weaving する設定。別 Assembly にする必要がありそう。

using Test.Urasandesu.NAnonym.Etc;
using Urasandesu.NAnonym.DI;

namespace Test
{
public class GlobalClass1 : GlobalClassBase // AppDomain を超える必要があるため、GlobalClassBase は MarshalByRefObjectを継承。
{
protected override GlobalClassBase SetUp()
{
var class1 = new GlobalClass<Class1>();
class1.SetUp(the =>
{
the.Method((string value) =>
{
return "Modified prefix at Class1.Print" + new Class2().Print(value) + "Modified suffix at Class1.Print";
})
.Instead(_ => _.Print);
});
class1.Load();
return class1;
}

private string NewPrint(string value)
{
return "Modified prefix at Class1.Print" + new Class2().Print(value) + "Modified suffix at Class1.Print";
}
}
}


GlobalClass2.cs
元のクラス 2を Weaving する設定。やはり別 Assembly にする必要がありそう。

using Test.Urasandesu.NAnonym.Etc;
using Urasandesu.NAnonym.DI;

namespace Test
{
public class GlobalClass2 : GlobalClassBase // AppDomain を超える必要があるため、GlobalClassBase は MarshalByRefObjectを継承。
{
protected override GlobalClassBase SetUp()
{
var class2 = new GlobalClass<Class2>();
class2.SetUp(the =>
{
the.Method((string value) =>
{
return "Modified prefix at Class2.Print" + value + "Modified suffix at Class2.Print";
})
.Instead(_ => _.Print);
});
return class2;
}
}
}


Program.cs
呼び側のイメージ。

using System;
using NUnit.Framework;
using Test.Urasandesu.NAnonym.DI;
using Test.Urasandesu.NAnonym.Etc;
using Urasandesu.NAnonym.DI;

namespace Test
{
public class Program
{
static Program()
{
// Inject、AcceptChanges は System.AppDomain の拡張メソッド。
// 新しい AppDomain を作成し、Load Time Weaving を行った後、元ファイルを入れ替える。
// ジェネリックパラメータに Weaving 設定用のクラスを指定。
// ※元のファイルが Load されるより先に実行させる必要がある。
AppDomain.CurrentDomain.Inject<GlobalClass1>();
AppDomain.CurrentDomain.Inject<GlobalClass2>();
AppDomain.CurrentDomain.AcceptChanges();
}

static void Main()
{
var class1 = new Class1();
var class2 = new Class2();

// 実行
string value = "aiueo";
Console.WriteLine(class1.Print(value));
Console.WriteLine(class2.Print(value));
/*
* Modified prefix at Class1.PrintModified prefix at Class2.Print aiueo Modified suffix at Class2.PrintModified suffix at Class1.Print
* Modified prefix at Class2.Print aiueo Modified suffix at Class2.Print
*/
}
}
}


作っていくうちに必要になったユーティリティもいっしょに公開していく予定。今年中には 1 パス動くといいな ...( = =)

2010年5月3日月曜日

DotNetOpenAuth でサンプルコード

サンプルはシンプルがいいよね。

OAuth の公式ページ、OAuth — An open protocol to allow secure API authorization in a simple and standard method from desktop and web applications.Code で、.NET Framework 向けのライブラリとして最初に掲示されてる DotNetOpenAuth

ライセンスも Microsoft Public License (Ms-PL) で提供されてるので、いいじゃんと思って使おうとしたら、サンプルコードがやたらがっつり書いてある。

こういうのは、処理の流れがわかる最低限の部分がわかればいいんだろうなと思いましたので、シンプルなサンプル、書いてみました。ちょうど Twitter の認証方式が OAuth に一本化されるということなので、今回はそれ向けで。(^^♪

利用する場合は以下のライブラリが必要になります。ありがたく使わせていただきますm(_ _)m
DotNetOpenAuth
 http://www.dotnetopenauth.net/
Apache log4net - Apache log4net: Home
 http://logging.apache.org/log4net/index.html


1. サンプルソース - DotNetOpenAuthSimpleSample -
サンプルは、GET statuses/home_timeline | dev.twitter.com の API をたたくもの。ここでは主要なクラスのみ紹介。

メイン
Program.cs
XmlSerializer に Parse させようとしている statuses クラスは、いったん API に生の XML を吐かせて Xsd.exe で XSD のガワを作成→少し整形 した自動生成コード。

using System;
using System.Diagnostics;
using System.Xml.Serialization;
using DotNetOpenAuth.Messaging;

namespace DotNetOpenAuthSimpleSample
{
class Program
{
static void Main(string[] args)
{
var statusesHomeTimeline = new MessageReceivingEndpoint(
"http://api.twitter.com/1/statuses/home_timeline.xml", HttpDeliveryMethods.GetRequest);

using (var resourceResponse = statusesHomeTimeline.Open(Verify))
using (var responseStream = resourceResponse.GetResponseReader())
{
var xmlSerializer = new XmlSerializer(typeof(statuses));
var statuses = (statuses)xmlSerializer.Deserialize(responseStream);

foreach (var status in statuses.status)
{
Console.WriteLine(
string.Format("User: {0}, Text: {1}, Location: {2}",
status.user.name, status.text, status.user.location));
}
}

Console.ReadLine();
}

private static string Verify(Uri authorizationLocation)
{
Process.Start(authorizationLocation.AbsoluteUri);
Console.Write("Please enter PIN code: ");
return Console.ReadLine();
}
}
}


Twitter 向け Consumer
TwitterConsumer.cs
ServiceProviderDescription を各サービス向けに書き換えれば良い。ThreadStatic になってるのは、自分の用途として、マルチスレッドで別々の認証情報を扱いながら処理を進めるってことが多いから。

using System;
using System.Collections.Generic;
using System.Configuration;
using System.Net;
using DotNetOpenAuth.Messaging;
using DotNetOpenAuth.OAuth;
using DotNetOpenAuth.OAuth.ChannelElements;

namespace DotNetOpenAuthSimpleSample
{
public static class TwitterConsumer
{
public delegate string VerifyCallback(Uri authorizationLocation);

[ThreadStatic]
private static ServiceProviderDescription serviceProviderDescription;

private static ServiceProviderDescription ServiceProviderDescription
{
get
{
if (serviceProviderDescription == null)
{
serviceProviderDescription = new ServiceProviderDescription
{
RequestTokenEndpoint = new MessageReceivingEndpoint("https://twitter.com/oauth/request_token",
HttpDeliveryMethods.GetRequest | HttpDeliveryMethods.AuthorizationHeaderRequest),
UserAuthorizationEndpoint = new MessageReceivingEndpoint("https://twitter.com/oauth/authorize",
HttpDeliveryMethods.GetRequest | HttpDeliveryMethods.AuthorizationHeaderRequest),
AccessTokenEndpoint = new MessageReceivingEndpoint("https://twitter.com/oauth/access_token",
HttpDeliveryMethods.GetRequest | HttpDeliveryMethods.AuthorizationHeaderRequest),
TamperProtectionElements = new ITamperProtectionChannelBindingElement[] { new HmacSha1SigningBindingElement() },
ProtocolVersion = ProtocolVersion.V10a,
};
}

return serviceProviderDescription;
}
}

public static bool IsConfigured
{
get
{
return !string.IsNullOrEmpty(ConfigurationManager.AppSettings["consumerKey"]) &&
!string.IsNullOrEmpty(ConfigurationManager.AppSettings["consumerSecret"]);
}
}

[ThreadStatic]
private static DesktopConsumer current;

private static DesktopConsumer Current
{
get
{
if (current == null)
{
if (IsConfigured)
{
var tokenManager = new InMemoryTokenManager();
tokenManager.ConsumerKey = ConfigurationManager.AppSettings["consumerKey"];
tokenManager.ConsumerSecret = ConfigurationManager.AppSettings["consumerSecret"];
current = new DesktopConsumer(ServiceProviderDescription, tokenManager);
}
else
{
throw new InvalidOperationException(
"No Twitter OAuth consumer key and secret could be found in App.config AppSettings.");
}
}

return current;
}
}

[ThreadStatic]
private static string accessToken;

public static IncomingWebResponse Open(this MessageReceivingEndpoint endpoint, VerifyCallback verify)
{
return Open(endpoint, verify, default(object));
}

public static IncomingWebResponse Open(
this MessageReceivingEndpoint endpoint, VerifyCallback verify, IDictionary<string, string> extraData)
{
return Open(endpoint, verify, extraData);
}

public static IncomingWebResponse Open(
this MessageReceivingEndpoint endpoint, VerifyCallback verify, IEnumerable<MultipartPostPart> binaryData)
{
return Open(endpoint, verify, binaryData);
}

private static IncomingWebResponse Open(this MessageReceivingEndpoint endpoint, VerifyCallback verify, object data)
{
if (accessToken == null)
{
string requestToken = null;
Uri authorizationLocation = Current.RequestUserAuthorization(null, null, out requestToken);
string verifier = verify(authorizationLocation);
var grantedAccess = Current.ProcessUserAuthorization(requestToken, verifier);
accessToken = grantedAccess.AccessToken;
}

HttpWebRequest request = null;
IDictionary<string, string> extraData = null;
IEnumerable<MultipartPostPart> binaryData = null;

if ((extraData = data as IDictionary<string, string>) != null)
{
request = Current.PrepareAuthorizedRequest(endpoint, accessToken, extraData);
}
else if ((binaryData = data as IEnumerable<MultipartPostPart>) != null)
{
request = Current.PrepareAuthorizedRequest(endpoint, accessToken, binaryData);
}
else
{
request = Current.PrepareAuthorizedRequest(endpoint, accessToken);
}

return Current.Channel.WebRequestHandler.GetResponse(request);
}
}
}


2. ダウンロード
ソリューション全体のダウンロードは こちら


Arduino 、Android、GAE とか新しいことやり始めて、改めてサンプルの大切さ、学んでます。( ..)φメモメモ

2010年4月3日土曜日

Eclipse で Arduino 02

Arduino に実際にイメージがアップロードできることが確認できたら、次はデバッガをアタッチしてみる。前々回の積み残し。

…と言っても、すでに 8 割がた環境構築は済んでいますので、デバッガの設定の紹介だけではなく、実際にセンサ用の閾値を変えながら動かしてみます。(^_^;)

こちらのページを参考に作成しています。偉大な先人に感謝です!
- Debugging - AVR-Eclipse
 
http://avr-eclipse.sourceforge.net/wiki/index.php/Debugging
- なんでも作っちゃう、かも。 Arduinoで遊ぼう - 赤外線距離センサ(GP2Y0A21YK0F)
 http://arms22.blog91.fc2.com/blog-entry-240.html
- avr-libc: Data in Program Space
 http://www.nongnu.org/avr-libc/user-manual/pgmspace.html
- Arduino - Tone
 http://arduino.cc/en/Tutorial/Tone
- Arduino - Tone2
 http://arduino.cc/en/Tutorial/Tone2


1. サンプルスケッチ - Hello Pitch follower2 -
デバッグするサンプルスケッチは、Arduino 公式サイトにある圧電スピーカサンプルに、赤外線式の距離センサを組み合わせた簡易テルミン的なもの。距離センサから出てくる値をちょいちょいチューニングしてみる。

ブレッドボード


回路図


プログラムリスト
pitches.h

/*************************************************
* Public Constants
*************************************************/

#define NOTE_B0 31
#define NOTE_C1 33
#define NOTE_CS1 35
#define NOTE_D1 37
#define NOTE_DS1 39
#define NOTE_E1 41
#define NOTE_F1 44
#define NOTE_FS1 46
#define NOTE_G1 49
#define NOTE_GS1 52
#define NOTE_A1 55
#define NOTE_AS1 58
#define NOTE_B1 62
#define NOTE_C2 65
#define NOTE_CS2 69
#define NOTE_D2 73
#define NOTE_DS2 78
#define NOTE_E2 82
#define NOTE_F2 87
#define NOTE_FS2 93
#define NOTE_G2 98
#define NOTE_GS2 104
#define NOTE_A2 110
#define NOTE_AS2 117
#define NOTE_B2 123
#define NOTE_C3 131
#define NOTE_CS3 139
#define NOTE_D3 147
#define NOTE_DS3 156
#define NOTE_E3 165
#define NOTE_F3 175
#define NOTE_FS3 185
#define NOTE_G3 196
#define NOTE_GS3 208
#define NOTE_A3 220
#define NOTE_AS3 233
#define NOTE_B3 247
#define NOTE_C4 262
#define NOTE_CS4 277
#define NOTE_D4 294
#define NOTE_DS4 311
#define NOTE_E4 330
#define NOTE_F4 349
#define NOTE_FS4 370
#define NOTE_G4 392
#define NOTE_GS4 415
#define NOTE_A4 440
#define NOTE_AS4 466
#define NOTE_B4 494
#define NOTE_C5 523
#define NOTE_CS5 554
#define NOTE_D5 587
#define NOTE_DS5 622
#define NOTE_E5 659
#define NOTE_F5 698
#define NOTE_FS5 740
#define NOTE_G5 784
#define NOTE_GS5 831
#define NOTE_A5 880
#define NOTE_AS5 932
#define NOTE_B5 988
#define NOTE_C6 1047
#define NOTE_CS6 1109
#define NOTE_D6 1175
#define NOTE_DS6 1245
#define NOTE_E6 1319
#define NOTE_F6 1397
#define NOTE_FS6 1480
#define NOTE_G6 1568
#define NOTE_GS6 1661
#define NOTE_A6 1760
#define NOTE_AS6 1865
#define NOTE_B6 1976
#define NOTE_C7 2093
#define NOTE_CS7 2217
#define NOTE_D7 2349
#define NOTE_DS7 2489
#define NOTE_E7 2637
#define NOTE_F7 2794
#define NOTE_FS7 2960
#define NOTE_G7 3136
#define NOTE_GS7 3322
#define NOTE_A7 3520
#define NOTE_AS7 3729
#define NOTE_B7 3951
#define NOTE_C8 4186
#define NOTE_CS8 4435
#define NOTE_D8 4699
#define NOTE_DS8 4978

main.cpp

/*
Hello Pitch follower2

Plays a pitch that changes based on a changing analog input.
This refered to Pitch follower and it was made.
see also:
* Arduino - Tone, http://arduino.cc/en/Tutorial/Tone
* Arduino - Tone2, http://arduino.cc/en/Tutorial/Tone2

The very useful distance measuring library - Distance.*, are made by arms22.
I'd like to take this occasion to express my gratitude to him all.
see also:
* なんでも作っちゃう、かも。 Arduinoで遊ぼう - 赤外線距離センサ(GP2Y0A21YK0F), http://arms22.blog91.fc2.com/blog-entry-240.html

created 4 Apr 2010
by Akira Sugiura

This example code is in the public domain.

http://urasandesu.blogspot.com/2010/04/eclipse-arduino-02.html

*/

#include "WProgram.h"
extern "C" void __cxa_pure_virtual() {
while (1)
;
}

#include "pitches.h"
#include <avr/pgmspace.h>
#include "Distance.h"

const uint16_t
PROGMEM TONE_SAMPLES[] = { NOTE_B0, NOTE_C1, NOTE_D1, NOTE_E1, NOTE_F1,
NOTE_G1, NOTE_A1, NOTE_B1, NOTE_C2, NOTE_D2, NOTE_E2, NOTE_F2,
NOTE_G2, NOTE_A2, NOTE_B2, NOTE_C3, NOTE_D3, NOTE_E3, NOTE_F3,
NOTE_G3, NOTE_A3, NOTE_B3, NOTE_C4, NOTE_D4, NOTE_E4, NOTE_F4,
NOTE_G4, NOTE_A4, NOTE_B4, NOTE_C5, NOTE_D5, NOTE_E5, NOTE_F5,
NOTE_G5, NOTE_A5, NOTE_B5, NOTE_C6, NOTE_D6, NOTE_E6, NOTE_F6,
NOTE_G6, NOTE_A6, NOTE_B6, NOTE_C7, NOTE_D7, NOTE_E7, NOTE_F7,
NOTE_G7, NOTE_A7, NOTE_B7, NOTE_C8, NOTE_D8 };
const int TONE_SAMPLES_LENGTH = sizeof(TONE_SAMPLES) / sizeof(uint16_t);
int toneSamplesMin = 0;
int toneSamplesMax = TONE_SAMPLES_LENGTH;

Distance distance = Distance(0);
int numberOfDistanceMin = 10;
int numberOfDistanceMax = 800;
int delayTime = 130;

int toneDuration = 100;

void setup() {
Serial.begin(9600);
}

void loop() {

distance.available();
int numberOfDistance = distance.numberOfDistance();
Serial.print(numberOfDistance);
Serial.println(" mm");

int toneSamplesIndex = map(numberOfDistance, numberOfDistanceMin,
numberOfDistanceMax, toneSamplesMin, toneSamplesMax);
Serial.print("toneSamplesIndex: ");
Serial.println(toneSamplesIndex);

unsigned int toneSample = pgm_read_word(&TONE_SAMPLES[toneSamplesIndex]);
Serial.print("toneSample: ");
Serial.println(toneSample);

tone(8, toneSample, toneDuration);

delay(delayTime);
}

int main(void) {
init();

setup();

for (;;)
loop();

return 0;
}


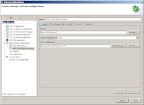
2. AVaRICE の設定
デバッガにアタッチするためには、gdbserver を起動しておく必要がある。ここでは JTAG/Debug Wire 接続に対応した AVaRICE を使用する。メニューから [Run] - [External Tools] - [External Tools Configurations...] を開く。

  1. [Name] に設定名を入れる(例."Start Avarice")。

  2. [Location] に AVaRICE のパスを設定する(例."C:\WinAVR-20100110\bin\avarice.exe")。

  3. [Working Directory] に AVaRICE の実行フォルダを設定する(例."C:\WinAVR-20100110\avr\bin")。

  4. [Arguments] に AVaRICE への引数を設定する(例."-2 -I -w -j usb :4242")。こちらで Linux man が見られるのでそちらも参考のこと。ちなみに、ここで例に挙げている引数は、"-2":JTAG ICE mkII を利用、"-I":割り込みの無視、"-w":Debug Wire 接続、"-j usb":JTAG ICE デバッガへの接続方式をUSBに指定、":4242":localhost(省略可能)の 4242 番ポートで待ち受け、となる。

  5. [Apply] し、[Close] で閉じる。


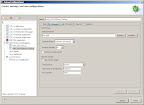
3. GDB Hardware Debugging の設定
gdbserver を起動すれば、Eclipse デバッガのアタッチができるようになる。gdbserver 同様、最初に設定が必要になるので、[Run] - [Debug Configurations...]を開いて設定を行う。

  1. [Name] に設定名を入れる(例."Hello_PitchFollower2")。

  2. [C/C++ Application] に実行するファイルのパスを設定する(例."Debug/Hello_PitchFollower2.elf")。[Search Project...] ボタンをクリックすれば、該当するファイルが一覧できる。

  3. [GDB Command] にデバッガのパスを設定する(例."avr-gdb")。

  4. [Command Set] は Standard(Windows)、[Protocol Version] は mi に設定する。

  5. [Use Remote Target] にチェックを入れ、[JTAG Device] を Generic、[Host name or IP address] を localhost、[Port number] は gdbserver で設定した 4242 を設定する。

  6. [Load Image] にチェックを入れ、[Image file name] は実行するファイルパスと同じものを指定する。(例."${workspace_loc:\Hello_PitchFollower2\Debug\Hello_PitchFollower2.elf}")。こちらも、[Workspace...] ボタンをクリックすれば、該当するファイルを一覧から選択できる。

  7. [Runtime Options] は、[Set breakpoint at] で、main で止まるよう指定し、[Resume] にチェックを入れておく。

  8. [Apply] し、[Close] で閉じる。


4. Terminal エミュレータの用意
シリアルの情報が見られる Terminal エミュレータを用意する。Windows であれば Tera Term が有名どころ。適宜ダウンロードしてインストールしておく。


5. デバッグ
実行イメージを Arduino にアップロードし、gdbserver → Eclipse デバッガの順に起動すると、設定しておいた main で止まる。あとは、普通のソフトをデバッグするのと同様に、ブレークポイントで止めて変数の中身を眺めたり、変更したりできる。レジスタやメモリの情報ももちろん同様に可能。

デバッグの様子


やっとこさ、下準備が整ってきたかな?先は長いです。(^_^;)

2010年3月13日土曜日

Windows で AVRDUDE ビルド

前回の宿題。

WinAVR に同梱されている AVRDUDE は USB Support を有効にしてのビルドがされていない。実行すると、

C:\WinAVR-20100110\bin>avrdude -pm328p -cjtag2isp -Pusb
avrdude was compiled without usb support.
avrdude: ser_send(): write error: sorry no info avail

みたいな感じで取り付く島もない。

前回の記事ではyukiさんビルドのAVRDUDEを使わせていただきましたが、頼ってばかりじゃだめなので、一からビルドする方法、まとめてみました。


1. MinGW/MSYS のインストール
Cygwin だと make 時の "-mno-cygwin" オプションではじかれてしまうため、MinGW/MSYS を利用する。
まずは、MinGW。
HOWTO Install the MinGW (GCC) Compiler Suite | MinGW を参考にダウンロード、インストール。なお、ここの記事中にもある通り、以後、configureする際は、

../path/to/configure --prefix=/mingw

もしくは、

../path/to/configure --prefix=`cd /mingw; pwd -W`

のようなprefix指定が必須になる。

MSYS は MSYS | MinGW を参考にダウンロード、インストール。


2. Cygwin のインストール
make 中に yacc やら bison やら必要になるが、それらを MinGW/MSYS 上でインストールしていくのは非常に骨が折れるため、Cygwin で利用できるものは利用する。
Cygwin Information and Installation を参考にダウンロード、インストール。インストール後、Cygwin の bin へパスを通ため、MSYS で /etc/profile (C:\msys\1.0\etc\profile) を好きなエディタで開き(※改行コードは LF なので注意)、

export HOME LOGNAME MSYSTEM HISTFILE

のすぐ下辺りに、

export PATH=$PATH:/c/cygwin/bin

を追記、保存。


3. LibUsb-Win32 のインストール
USB Support を有効にするためには、LibUsb-Win32 のヘッダファイルやライブラリの Static Link が必要になる。LibUsb-Win32 からダウンロードし、Cドライブ直下等にインストールしておく。


4. AVRDUDE のビルド
AVR Downloader/UploaDEr - Summary [Savannah] からソースコードをダウンロード。順にコマンドを叩いていく。

user@COMPUTER ~/user
$ tar zxvf avrdude-5.8.tar.gz 

avrdude-5.8
avrdude-5.8/README
avrdude-5.8/configure.ac
~(中略)~
avrdude-5.8/doc/texinfo.tex
avrdude-5.8/doc/avrdude.texi
avrdude-5.8/doc/avrdude.info

user@COMPUTER ~/user
$ cd avrdude-5.8

user@COMPUTER ~/user/avrdude-5.8
$ export CPPFLAGS="-I/c/LibUSB-Win32/include"

user@COMPUTER ~/user/avrdude-5.8
$ export CFLAGS="-I/c/LibUSB-Win32/include"

user@COMPUTER ~/user/avrdude-5.8
$ export LDFLAGS="-L/c/LibUSB-Win32/lib/gcc"

user@COMPUTER ~/user/avrdude-5.8
$ ./configure --prefix=/mingw

checking build system type... i686-pc-mingw32
checking host system type... i686-pc-mingw32
checking target system type... i686-pc-mingw32
~(中略)~
config.status: creating avrdude.conf.tmp
config.status: creating ac_cfg.h
config.status: executing depfiles commands

user@COMPUTER ~/user/avrdude-5.8
$ make

make  all-recursive
make[1]: Entering directory `/home/user/avrdude-5.8'
Making all in windows
make[2]: Entering directory `/home/user/avrdude-5.8/windows'
gcc -DHAVE_CONFIG_H -I. -I..   -I/c/LibUSB-Win32/include  -I/c/LibUSB-Win32/include -mno-cygwin -DWIN32NATIVE -MT loaddrv.o -MD -MP -MF .deps/loaddrv.Tpo -c -o loaddrv.o loaddrv.c
mv -f .deps/loaddrv.Tpo .deps/loaddrv.Po
gcc  -I/c/LibUSB-Win32/include -mno-cygwin -DWIN32NATIVE -mno-cygwin -L/c/LibUSB-Win32/lib/gcc -static -o loaddrv.exe loaddrv.o  
make[2]: Leaving directory `/home/user/avrdude-5.8/windows'
make[2]: Entering directory `/home/user/avrdude-5.8'
/bin/sh ./ylwrap config_gram.y y.tab.c config_gram.c y.tab.h config_gram.h y.output config_gram.output -- bison -y  -d
cygwin warning:
  MS-DOS style path detected: C:/msys/1.0/home/user/avrdude-5.8/config_gram.y
  Preferred POSIX equivalent is: /cygdrive/c/msys/1.0/home/user/avrdude-5.8/config_gram.y
  CYGWIN environment variable option "nodosfilewarning" turns off this warning.
  Consult the user's guide for more details about POSIX paths:
    http://cygwin.com/cygwin-ug-net/using.html#using-pathnames
updating config_gram.h
~(中略)~
ar cru libavrdude.a libavrdude_a-config_gram.o libavrdude_a-lexer.o libavrdude_a-arduino.o libavrdude_a-avr.o libavrdude_a-avr910.o libavrdude_a-avrpart.o libavrdude_a-bitbang.o libavrdude_a-butterfly.o libavrdude_a-config.o libavrdude_a-confwin.o libavrdude_a-crc16.o libavrdude_a-fileio.o libavrdude_a-jtagmkI.o libavrdude_a-jtagmkII.o libavrdude_a-lists.o libavrdude_a-par.o libavrdude_a-pgm.o libavrdude_a-ppi.o libavrdude_a-ppiwin.o libavrdude_a-safemode.o libavrdude_a-serbb_posix.o libavrdude_a-serbb_win32.o libavrdude_a-ser_avrdoper.o libavrdude_a-ser_posix.o libavrdude_a-ser_win32.o libavrdude_a-stk500.o libavrdude_a-stk500v2.o libavrdude_a-stk500generic.o libavrdude_a-usbasp.o libavrdude_a-usb_libusb.o libavrdude_a-usbtiny.o libavrdude_a-update.o 
ranlib libavrdude.a
gcc -DHAVE_CONFIG_H -I.  -DCONFIG_DIR=\"/mingw/etc\" -I/c/LibUSB-Win32/include -Wall -I/c/LibUSB-Win32/include -mno-cygwin -DWIN32NATIVE -MT avrdude-main.o -MD -MP -MF .deps/avrdude-main.Tpo -c -o avrdude-main.o `test -f 'main.c' || echo './'`main.c
mv -f .deps/avrdude-main.Tpo .deps/avrdude-main.Po
gcc -DHAVE_CONFIG_H -I.  -DCONFIG_DIR=\"/mingw/etc\" -I/c/LibUSB-Win32/include -Wall -I/c/LibUSB-Win32/include -mno-cygwin -DWIN32NATIVE -MT avrdude-term.o -MD -MP -MF .deps/avrdude-term.Tpo -c -o avrdude-term.o `test -f 'term.c' || echo './'`term.c
mv -f .deps/avrdude-term.Tpo .deps/avrdude-term.Po
gcc -Wall -I/c/LibUSB-Win32/include -mno-cygwin -DWIN32NATIVE  -L/c/LibUSB-Win32/lib/gcc -static -o avrdude.exe avrdude-main.o avrdude-term.o ./libavrdude.a -lusb -lhid -lsetupapi -lm 
make[2]: Leaving directory `/home/user/avrdude-5.8'
make[1]: Leaving directory `/home/user/avrdude-5.8'


5. 元の WinAVR の AVRDUDE と入れ替え
ビルドでできた「avrdude.conf」「avrdude.exe」を WinAVR の AVRDUDE と入れ替える。これで実行すれば、

C:\WinAVR-20100110\bin>avrdude -pm328p -cjtag2isp -Pusb
avrdude: usbdev_open(): did not find any USB device "usb"

のように USB を探しに行ってくれる。


ちなみに MinGW/MSYS は Windows の環境変数設定の影響を結構受けるので、仮想マシンなどでクリーンなビルド環境が用意できると、変なところで悩まずに済みます。(^_^;)←

2010年2月28日日曜日

Eclipse で Arduino 01

自分用備忘録。開発環境はいつも使ってるのを使いたいよね その3。

Arduino は、フィジカルコンピューティングのためのオープンソースプラットフォーム。

以前の Gainer 同様、私のような組み込み初心者でも、気軽にプロトタイピングを行えるのが魅力。ただ、違うのは、作ったプログラムをボードに書き込んで動かすってこと。この辺は心理的に大きな壁になると思います。なぜなら、デバッグが大変だから。

話が一旦飛びますが、私、スマートフォンアプリの開発技術も必要で、 Android の勉強もやっているのですが、私のような組み込み初心者が、最初に驚くのは、実際に実機に繋いでデバッグできるってところだと思います。
Eclipse でデバッグ実行したら、ちょいちょいブレークポイントで止めて、標準出力にデータ流しながら、センサー用の閾値をとりあえず決めたりできるのはすごい衝撃でした。

この件があったもので、Arduino を知って初めて触り、いくつかサンプルを作ったところで、参考書通りに作るのはいいけど、この先、この IDE でどうしよう…と。

そこで、タイトルにもあるように、今回も Eclipse で Arduino 操作してみます。

こちらのページを参考に作成しています。偉大な先人に感謝です!
- Arduino playground - Eclipse
 
http://www.arduino.cc/playground/Code/Eclipse
- exploration ≫ Blog Archive ≫ Arduino in Eclipse
 
http://robertcarlsen.net/2009/10/31/arduino-in-eclipse-989
- Debugging - AVR-Eclipse
 
http://avr-eclipse.sourceforge.net/wiki/index.php/Debugging
- 小ネタ[AVR mkII Lite (JTAGICE mkII / DebugWIRE clone)を使ってみた。 (2008-08-10)]
 
http://www.kako.com/neta/2008-006/2008-006.html
- avrdude-GUI (yuki-lab.jp Version)
 
http://yuki-lab.jp/hw/avrdude-GUI/index.html


1. デバッガの準備
Arduino だけでは Eclipse でデバッグできないため、デバッガを準備する。純正のデバッガは高価だったため、安価なクローンを利用。
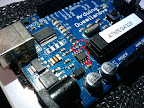
※ KEE のデバッガは対応するマイコンによっていくつかバージョンがある。私が使用したのは新しい Arduino Duemilanove (http://arduino.cc/en/Main/ArduinoBoardDuemilanove)で、載っているのは ATmega328 なので上記デバッガを選択。
※ SparkFun での配送方法について。USPSのFirst-Class以外は追跡ができる。


2. Arduino 改造(※標準の Arduino IDE で利用できなくなります)
ATmega328 で使われてる debugWIRE は RESET ピンで通信する。余計な回路が繋がってるとうまく動かない。DTR 信号が入ってこないよう、チップコンデンサを外す。
Arduino Duemilanove のページにある Schematic & Reference Design から回路図はダウンロードできる。「C13」のコンデンサがそれ。
※ デジタル回路難しいです (^_^;) 勉強せねば。
※ ATmega328 と ATmega328P は省電力版かどうかの違い。


3. デバッガのケーブル交換、インストール
KEE mkII Lite v2 は標準で 10 ピンの ISP I/F ケーブルが付いてる(ISP2JTAG アダプタも付いてる)。しかし、Arduino のボードにあるのは 6 ピンのミニ ICSP I/F なので変換が必要となる。AVR - ICSP Adapter と交換。
付属の CD-R からドライバをインストールしておく。
※ 変換基板部分が思ったより長く、交換したものの蓋が閉められなくなった。カパカパ状態で運用中。


4. Eclipse を Download してインストール
Eclipse Downloads http://www.eclipse.org/downloads/ から Eclipse IDE for C/C++ Developers をダウンロードする。ダウンロードしたファイルは好きなところに解凍。以下、Eclipse 3.5 Galileo について記述。


5. Plugin を Download してインストール
[Help]-[Install New Software...]を選択。Install ダイアログが開いたら、http://avr-eclipse.sourceforge.net/updatesite/ から AVR Plugin をインストールする。使用許諾書が表示されるため、受諾。


6. AVR tools を Download してインストール
WinAVR(http://winavr.sourceforge.net/) のページへ行き [Download] メニューからダウンロード。現在は SourceForge.net の WinAVR プロジェクトサイト(http://sourceforge.net/projects/winavr/files/) へのリンクがあるだけなので、結局はそちらでダウンロードすることになるはず。
この記事を書いた時点では、「WinAVR-20100110-install.exe」が最新。ダウンロードしてインストール。インストール後は Eclipse を再起動。


7. AVRDUDE を USB 対応版に変更
こちらの記事を参考に、USB 対応版 AVRDUDE を作成。
生成したバイナリを書き込む AVRDUDE だが、WinAVR に同梱されているものは USB を有効にしたビルドが行われていない。
http://yuki-lab.jp/hw/avrdude-GUI/index.html から USB を有効にした AVRDUDE をダウンロードし、WinAVR のものと交換しておく(デフォルトインストールしていれば、「C:\WinAVR-20100110\bin\avrdude.conf」と「C:\WinAVR-20100110\bin\avrdude.exe」が対象)。
LibUSB-Win32 も合わせてインストールしておく。
※ この記事を書いた時点で、AVRDUDE はバージョンは 5.8 まで上がっているので、できればソースからビルドしたいのですが、Cygwin 上での configure が上手く行かず保留中です。(^_^;) わかり次第新しい記事を書くです。
※ 新しい記事書けたのでそちらをご参照くださいませ。<(_ _)>(2010/03/29 追記)


8. Eclipse のセットアップ
Eclipse を再起動したら、[Window]-[Preference] を開く。
[AVR]-[Paths] と辿り、先ほどインストールした WinAVR のインストール情報が自動的に設定されていることを確認。
[AVR]-[AVRDude] と辿り、configuration を追加する。

  1. [Add] ボタンをクリックし、[Edit AVRDude Programmer Configuration New Configuration] ダイアログを開く。

  2. [Configuration name] に「Atmel JTAG ICE mkII ISP」を入力。[Description] には適宜コメントを。

  3. [Programmer Hardware] は「Atmel JTAG ICE mkII in ISP mode」を選択。

  4. [Override default port] に「usb」を入力。

  5. [Override default baudrate] は「115200」を選択。

  6. [Delay between avrdude invocations] に「2000」を入力。

  7. [OK] ボタンをクリックし、作成。同様の手順で、[Programmer Hardware] が「Atmel JTAG ICE mkII in debugWire mode」のものを作成。

  8. [Preference] を [Apply] し、[OK] で閉じる。


9. Arduino プロジェクトの作成(前半)
Arduino プロジェクト用の環境を作成する。前半スタート。

  1. [File] - [New] - [C++ Project] を選択

  2. [C++ Project] ダイアログで、[Project name:] を "Hello_Blink"、[Project type:] を [AVR Cross Target Application] - [Empty Project] で設定し、[Finish]

  3. 生成された "Hello_Blink" を選択し、右クリックメニューを開く。[Properties] を選択

  4. [Properties] ダイアログで、[AVR] - [AVRDude] と辿り、[Programmer] タブの [Programmer configuration] を先ほど設定した「Atmel JTAG ICE mkII ISP」に変更

  5. デバッガ、Arduino を接続。[Properties] ダイアログで、[AVR] - [TargetHardware] と辿り、[MCU Type] を「ATmega328P」に変更し、[Load from MCU]ボタンをクリック。エラーが出なければ接続成功なので、[OK] しダイアログを閉じる。


10. Arduino コアライブラリの取り込み
Eclipse で開発する場合、Arduino IDE の場合に自動的に生成されるコアライブラリを取り込む必要がある。

  1. Arduino IDE を実行する

  2. [File] - [Examples] - [Digital] - [Blink] を選択し、Blink スケッチを開く

  3. [Verify] ボタンをクリックし、スケッチをコンパイル。[Upload] ボタンをクリックし、アップロードを行う

  4. C:\Users\<username>\AppData\Local\Temp\buildXXXXXXXXXXXXXXXXXXXXX.tmp(Windows XP の場合は、C:\Documents and Settings\<username>\Local Settings\Temp\buildXXXXXXXXXXXXXXXXXXXXX.tmp)に、スケッチのコンパイル・アップロード結果が生成されるため、フォルダを開く

  5. 中にある「core.a」を Eclipse で現在作成している "Hello_Blink" プロジェクトへドラッグ & ドロップする。

  6. プロジェクトに入った「core.a」を右クリックし、[Rename...] で名前を「libcore.a」に変更する


11. Arduino プロジェクトの作成(後半)
後半ではビルド用の環境を整える。

  1. Eclipse に戻り、"Hello_Blink" を右クリック、[Properties] メニューを選択する

  2. [Properties] ダイアログで、[C/C++ Build] - [Settings] と辿り、[Tool Settings] タブを選択する

  3. [Additional Tools in Toolchain] を選択。[Generate HEX file for Flash memory]、[Print Size] にチェックが入っていること、それ以外は未チェックであることを確認する

  4. [AVR C++ Compiler] - [Directories] を選択。[Include Paths] で Arduino 用のインクルードファイルがあるフォルダを追加する。場所は「[Arduinoインストールフォルダ]\hardware\cores\arduino」

  5. [AVR C++ Compiler] - [Optimization] を選択。[Optimization Level] を「Size Optimizations (-Os)」にしておく

  6. [AVR C++ Linker] - [Libraries] を選択。[Libraries] に「core」、[Libraries Path] に「${workspace_loc:/Hello_Blink}」を設定する

  7. [OK]し、ダイアログを閉じる


12. main.cpp の追加
とりあえず Blink(http://arduino.cc/en/Tutorial/Blink) を実装してみる。元のソースと変わるのは適宜インクルードが必要になることと、main 関数を追加するぐらい。あと、Linker でコアライブラリとリンクするときにエラーが出るので、それに従って __cxa_pure_virtual 関数を externする。

/*
Blink

Turns on an LED on for one second, then off for one second, repeatedly.

The circuit:
* LED connected from digital pin 13 to ground.

* Note: On most Arduino boards, there is already an LED on the board
connected to pin 13, so you don't need any extra components for this example.


Created 1 June 2005
By David Cuartielles

http://arduino.cc/en/Tutorial/Blink

based on an orginal by H. Barragan for the Wiring i/o board

*/

#include "WProgram.h"
extern "C" void __cxa_pure_virtual() {
while (1)
;
}

int ledPin = 13; // LED connected to digital pin 13

// The setup() method runs once, when the sketch starts

void setup() {
// initialize the digital pin as an output:
pinMode(ledPin, OUTPUT);
}

// the loop() method runs over and over again,
// as long as the Arduino has power

void loop() {
digitalWrite(ledPin, HIGH); // set the LED on
delay(1000); // wait for a second
digitalWrite(ledPin, LOW); // set the LED off
delay(1000); // wait for a second
}

int main(void) {
init();

setup();

for (;;)
loop();

return 0;
}


13. 実行
ビルド後、プロジェクトの右クリック、[AVR] - [Upload Project to Target Device] でイメージをアップロードする。


長くなりすぎたかも?AVRDUDE のビルドとか、まだ宿題も残っているので次回もこの絡みで続くです。

2010年2月7日日曜日

Eclipse で Gainer

自分用備忘録。開発環境はいつも使ってるのを使いたいよね その2。

Gainer は、Flash、Max/MSP、Processing で操作できる I/O モジュール。

技術者じゃない人/コンピュータ初心者の人が面白い!便利!だと思ってくれるようなものを作りたいって時、人との I/F が難しい。やっぱりマウスとキーボードの操作って難しいし、直感的でないこともしばしばある。
私は仕事でソフトウェアをやっていますが、組み込みだとかは学生時代に工学実験した程度。
そんな人間が、こんな I/F があると簡単/便利なんだろうなと思った時に、結構手軽にプロトタイプを作れそうなのがこの Gainer です。

タイトルにもあるように、今回は Eclipse で Processing 使って Gainer 操作してみます。

1. Gainer ドライバのインストール
チュートリアルを参考に USB ドライバをインストールしておく。

2. Eclipse で Processing を使えるようにする
前回のエントリを参考に、Eclipse で Processing を使えるようにしておく。
※作成したサンプルプロジェクト「TestProcessing」をそのまま使って行きます。

3. Processing 用 Gainer ライブラリを Download
Processing 用 Gainer ライブラリをここからダウンロードする。適当な場所で解凍。

4. ビルドパスの追加
ライブラリを解凍した時にできる libraries\gainer\library フォルダから必要な jar ファイルをビルドパスに追加する。
プロジェクトを右クリック、[Build Path]-[Add External Archives...]。libraries\gainer\library フォルダにある gainer.jar, RXTXcomm.jar を選択する。

5. ライブラリのインポート
Gainer ライブラリを解凍した時にできる libraries\gainer\library フォルダから必要なライブラリをプロジェクトにインポートする。
プロジェクトを右クリック、[Import...]。
開いたダイアログで[General]-[File System]を選択し、[Next>]。
libraries\gainer\library フォルダにある librxtxSerial.jnilib, librxtxSerial.so, rxtxSerial.dll を選択。
[Into folder]を出力フォルダに変更し(出力フォルダがデフォルトのままであれば、TestProcessing/bin)、[Finish]。

6. クラスの作成、コードの記述
コード例1:button をとりあえず記述。

Sketch01.java

import processing.core.PApplet;
import processing.gainer.Gainer;

public class Sketch01 extends PApplet {

private static final long serialVersionUID = 8419122392829951234L;

Gainer gainer;

@Override
public void setup() {
size(200, 200);
gainer = new Gainer(this);
}

@Override
public void draw() {
background(0);
if (gainer.buttonPressed) {
background(255);
}
}

}


7. 実行
[Package Explorer]で作成したクラスを右クリック、[Run As]-[Java Applet]。


よし、次は Eclipse で Arduino するです。

2010年2月6日土曜日

Eclipse で Processing

自分用備忘録。開発環境はいつも使ってるのを使いたいよね。

Processing は Java そのもの。画像を簡単に扱えるようにしたライブラリ、ぐらいの認識のほうがいいのかも。
そうなると、外とのやりとりに Apache Software Foundation の成果を使いたくなるでしょうし、さらにがりがり書こうとすると、やれバージョン管理やら、やれパッケージングやら、やれ入力補完やら欲しくなってくる…。ということで、Eclipse、使います。
設定方法の公式ページはこちら。基本的にざっくり訳しただけというメモ書きです。(^^ゞ
- Processing in Eclipse \ Processing 1.0
 http://processing.org/learning/eclipse/

1. Eclipse を Download してインストール
http://www.eclipse.org/downloads/ から Eclipse IDE for Java Developers をダウンロードする。ダウンロードしたファイルは好きなところに解凍。

2. 新しいプロジェクトを作成
Welcome 画面閉じて、[Package Explorer]で右クリック、[New]-[Java Project]。プロジェクト名はとりあえず「TestProcessing」で。

3. Processing のライブラリをインポート
Processing インストールした時にできる lib フォルダから必要な jar ファイルをビルドパスに追加する。先ほど作成したプロジェクトを右クリック、[Build Path]-[Add External Archives...]。lib フォルダにある core.jar を選択する。
ちなみに core.jar 、GNU LGPL なんでその辺り気になる方はお気を付けを。

4. クラスの作成、コードの記述
サンプルコードを書いてみる。

import processing.core.PApplet;


public class MyProcessingSketch extends PApplet {

private static final long serialVersionUID = -1530381177827393671L;

@Override
public void draw() {
stroke(255);
if (mousePressed) {
line(mouseX, mouseY, pmouseX, pmouseY);
}
}

@Override
public void setup() {
size(200, 200);
background(0);
}

}


適当な解説とか。

  • processing.core.* パッケージに必要なクラスが色々入ってる。適宜 Import する(Ctrl+Shift+O!)。

  • processing.core.PApplet クラスを extends する。Processing の全ての機能が利用できるようになる。

  • setup(), draw() メソッドを Override する(Alt+Shift+S, v!)。


5. 実行
[Package Explorer]で作成したクラスを右クリック、[Run As]-[Java Applet]。
普通の Java アプリケーションとして実行したい場合は、以下の通り main メソッドを追加して、[Run As]-[Java Application]。

import processing.core.PApplet;


public class MyProcessingSketch extends PApplet {

private static final long serialVersionUID = 8801683180749406362L;

@Override
public void draw() {
stroke(255);
if (mousePressed) {
line(mouseX, mouseY, pmouseX, pmouseY);
}
}

@Override
public void setup() {
size(200, 200);
background(0);
}

public static final void main(String[] args) {
PApplet.main(new String[] { "--present", "MyProcessingSketch" });
}
}


複数のクラスを使う場合
このサンプルスケッチを Eclipse で作る場合、Processing のスケッチで使われてる Stripe クラスは実際はインナークラスとして定義されてる。
こんな感じで。

import processing.core.PApplet;

public class MyProcessingSketch2 extends PApplet {

private static final long serialVersionUID = 978193620686319475L;

// An array of stripes
Stripe[] stripes = new Stripe[50];

@Override
public void setup() {
size(200, 200);
// Initialize all "stripes"
for (int i = 0; i < stripes.length; i++) {
stripes[i] = new Stripe();
}
}

@Override
public void draw() {
background(100);
// Move and display all "stripes"
for (int i = 0; i < stripes.length; i++) {
stripes[i].move();
stripes[i].display();
}
}

class Stripe {
float x; // horizontal location of stripe
float speed; // speed of stripe
float w; // width of stripe
boolean mouse; // state of stripe (mouse is over or not?)

Stripe() {
x = 0; // All stripes start at 0
speed = random(1); // All stripes have a random positive speed
w = random(10, 30);
mouse = false;
}

// Draw stripe
void display() {
fill(255, 100);
noStroke();
rect(x, 0, w, height);
}

// Move stripe
void move() {
x += speed;
if (x > width + 20)
x = -20;
}
}
}


バージョン管理とかする場合、複数のファイルに分割して、手を入れる範囲を少なくしておきたいと思う。分割する場合は、親クラスを生成時に渡してあげるといい。こんな感じで。

MyProcessingSketch2.java

import processing.core.PApplet;

public class MyProcessingSketch2 extends PApplet {

private static final long serialVersionUID = -3546131844473457390L;

// An array of stripes
Stripe[] stripes = new Stripe[50];

@Override
public void setup() {
size(200, 200);
// Initialize all "stripes"
for (int i = 0; i < stripes.length; i++) {
stripes[i] = new Stripe(this);
}
}

@Override
public void draw() {
background(100);
// Move and display all "stripes"
for (int i = 0; i < stripes.length; i++) {
stripes[i].move();
stripes[i].display();
}
}
}


Stripe.java

import processing.core.PApplet;


public class Stripe {

PApplet parent;

float x; // horizontal location of stripe
float speed; // speed of stripe
float w; // width of stripe
boolean mouse; // state of stripe (mouse is over or not?)

Stripe(PApplet parent) {
this.parent = parent;
x = 0; // All stripes start at 0
speed = parent.random(1); // All stripes have a random positive speed
w = parent.random(10, 30);
mouse = false;
}

// Draw stripe
public void display() {
parent.fill(255, 100);
parent.noStroke();
parent.rect(x, 0, w, parent.height);
}

// Move stripe
public void move() {
x += speed;
if (x > parent.width + 20)
x = -20;
}
}


よし、次は Eclipse で Gainer するです。